BitzButler - a quick guide to key in the bills from supplier

Small biz? No prob! Swap paper for digital and grow easy-peasy! 🌱😎
Ready to simplify?
Table of contents
📝 Key Takeaways
- Timer Saver - BitzButler is designed to speed up every data entry and reporting. ⏰
- Stock control - once a bill has been keyed in, the inventory level will be updated automatically for inventory item.😎
- Audit trail - any changes have an audit trail. This is a very important feature as compared to the manual recording process. This is critical in the sense of security and compliance.
-
No Accounting knowledge Needed - BitzButler is designed for owners, not just bookkeepers.🍰
-
Instant Setup - move from messy records in spreadsheet to a clean dashboard in minutes.🎉
Overview
A bill will be issued by the supplier after the delivery of supplies or rendered a service. Upon receiving the bills, you should keep track of the bill with some sort of system which can be a spreadsheet or tracking it manually.
Then, the following should happen after recorded a bill:
- You need to schedule the payment based on the term days.
- Update the inventory level.
- Update the amount owing to the supplier.
FAQ
Q: Does the system automatically update the inventory level?
A: Yes. Once you have saved the supplier's bill successfully, the inventory level will be updated by adding the quantity received automatically.
On the other hand, the inventory cost will be updated as well. In BitzButler, we are using an average costing method to calculate this value.
Q: Which inventory costing method that supported by BitzButler?
A: In BitzButler, it supports the Average costing method only.
Q: Do I need to key in the rental bill into the system?
A: Yes. Rental is considered a 'service' rendered by the landlord. After you have keyed in the rental, the system will automatically increase the rental expense.
Q: Does the system make any double entry automatically?
A: Yes. The system will perform double entry automatically behind the scenes.
BitzButler Billing
Keying in a supplier's bill is considered receiving stock or services from the supplier. After you have keyed in the bill, the system will run the following processes:
- For an inventory item, the system will update the inventory level and the cost (using average costing method).
- For an expense item such as rental, the system will increase the total expense.
- Update the amount owing to the supplier and the AP aging report will reflect this new value.
- The AP aging chart on the dashboard will be reflected with the changes.
How to key in a supplier's bill on desktop computer
-
Open the Accounting app by tapping on Advanced → Accounting.
-
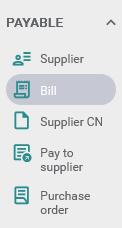
Click Payable.
-
Click Bill and the following screen will appear.
On the left hand side, it has many criteria which helps you in shortlisting the bills.
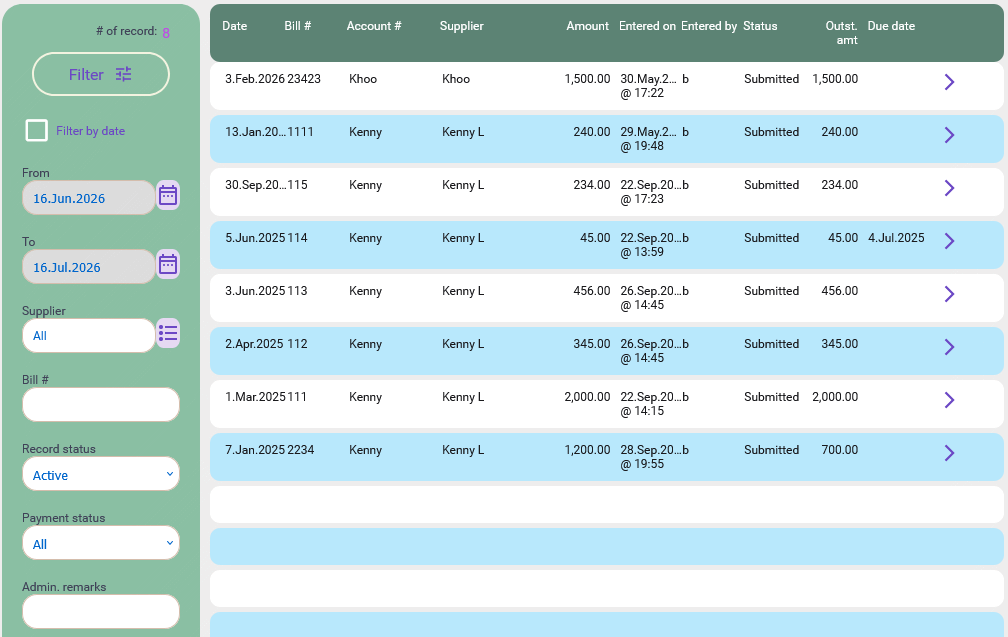
Notes: please ensure that you click on the Filter button after you have changed the criteria.
-
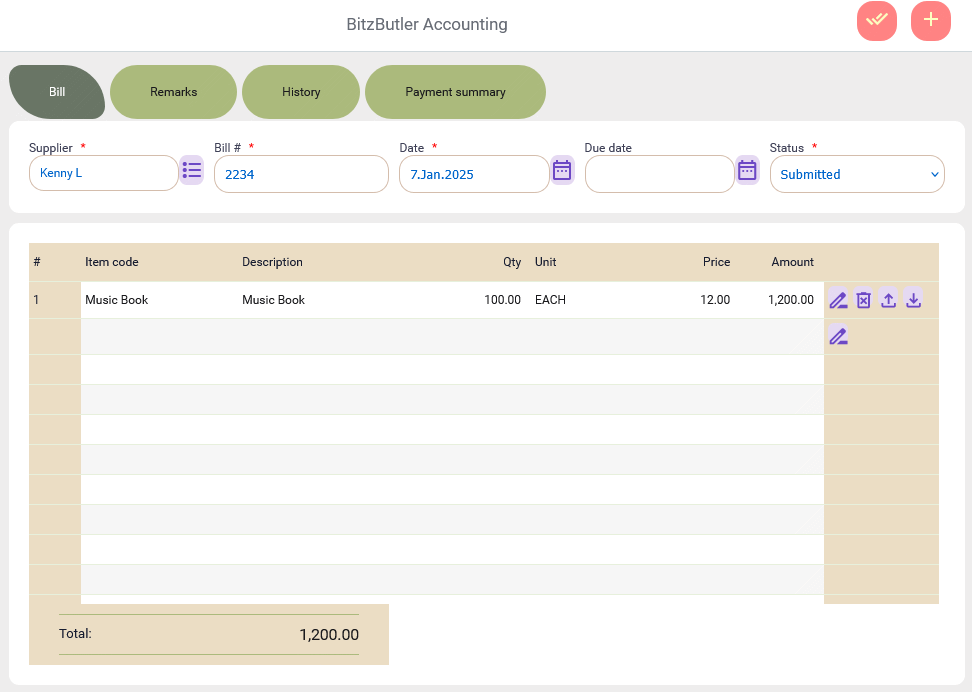
Click the Add option (located at the top right) and then the following screen will appear.
-
Fill in the compulsory fields that have a red asterisk symbol.
-
Click on the Item Line tab and fill in the services or products that have been supplied/rendered.
-
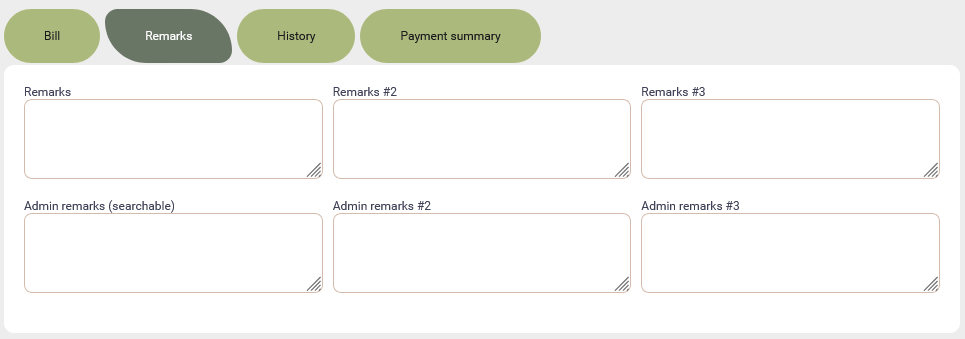
Switch to the Remarks tab. There are 6 remarks fields on this screen and you may have to decide the purpose of the remarks field. No hard rule.
-
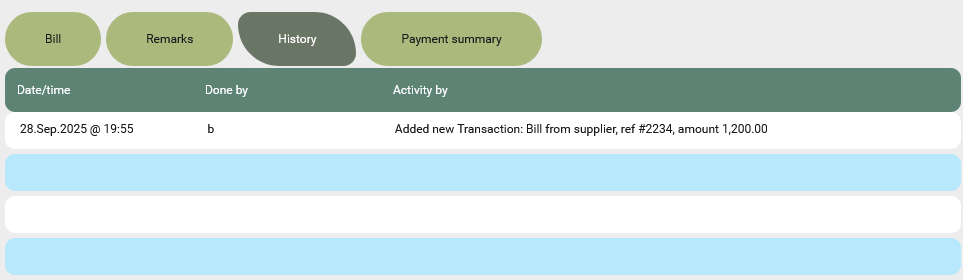
Click Save option (located at the top right) once you have done with the data entry. Then, the History and Payment summary tab will appear after successfully saving the data.
In the History tab, it has all the information about when the bill was issued and the changes made on this bill.
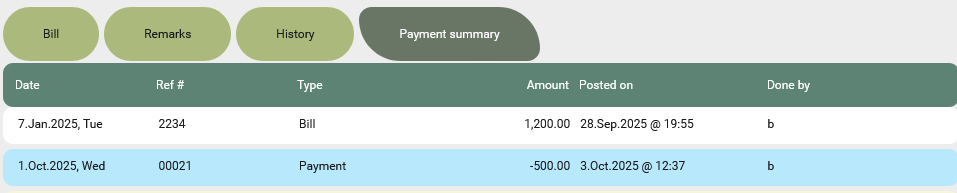
In the Payment summary tab, it shows the bill issuing date and the payment date. This tab is particularly useful if you made multiple partial payments. You can easily spot how long and how many payments it takes to fully settle a bill.
Edit a supplier's bill on desktop view
-
Double click on any row to edit the bill OR click on the right arrow on any row.
-
Edit the necessary fields.
-
Click Save (located at the top right).
Delete a supplier's bill on desktop view
-
Double click on any row to edit the bill OR click on the right arrow on any row.
-
Choose 'Voided' from the Status field.
-
Click Save (located at the top right).
Notes: no transaction can be deleted from the database except marking the transaction as 'voided'.
Summary
With BitzButler Billing, it certainly helps the user in completing more tasks in a efficiently.
Start entering supplier bills for Free. No credit card needed to sign up.
#Tutorial | #AP | #Accounting | #Blog listing