BitzButler helps in tracking the payment to supplier

Ready to simplify?
Table of contents
📝 Key Takeaways
- Timer Saver - BitzButler is designed to speed up every data entry and reporting. ⏰
- No Accounting knowledge Needed - BitzButler is designed for owners, not just bookkeepers.🍰
- Audit trail - any changes have an audit trail. This is a very important feature as compared to the manual recording process. This is critical in the sense of security and compliance.
-
Instant Setup - move from messy payment record in spreadsheet to a clean dashboard in minutes.🎉
Overview
Tracking a payment made to the supplier is an important step in order to have an up-to-date AP aging report. It gives you an idea of the total amount owing to the supplier.
FAQ
Q: I don’t have any accounting experience or knowledge, will I be able to handle the payment to supplier?
A: Yes. You may start using our BitzButler Pay To Supplier with minimal or no accounting knowledge as long as you know how much you are paying your supplier. Upon saving the payment to the supplier, the system will process the paid amount by posting it to the correct account and update the Balance Sheet in real-time.
The best thing is that no formula is required to set up like those who are using a spreadsheet.
Q: Is there a way to find out the due invoices?
A: Yes.
-
On Pay to Supplier screen - once you have chosen a supplier in the Pay to Supplier screen and the due invoices will appear on the screen.
-
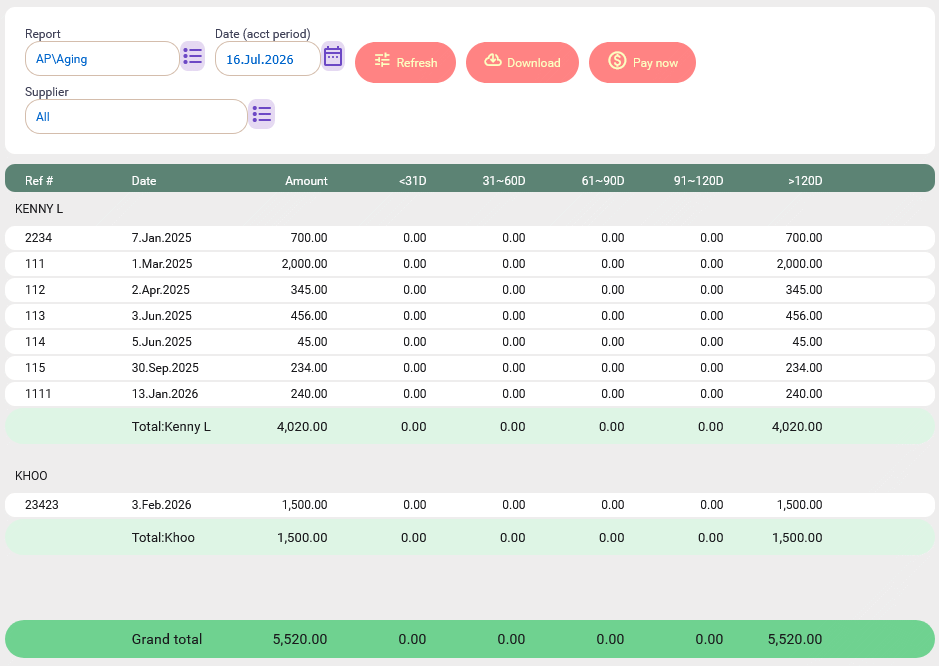
Reports \ AP aging report - you will find the due invoices in this report.
-
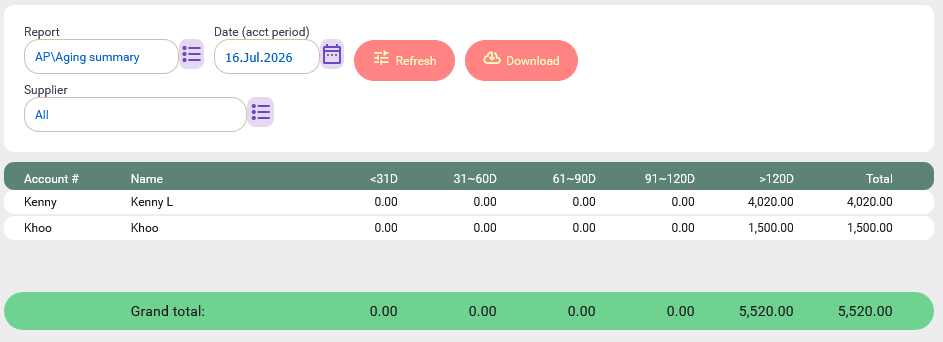
Reports \ AP aging summary report - you will find the amount owing to each supplier in this report.
BitzButler Pay To Supplier
Here are the steps to key in the payment to the supplier in BitzButler.
How to key in the payment to supplier on desktop view?
The invoice entry in the BitzButler Pay To Supplier module is an advanced entry screen which has more fields and more information.
-
Open the Accounting app by tapping on Advanced → Accounting.
-
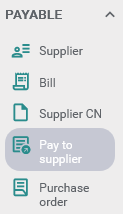
Click Payable.
-
Click Pay to Supplier.
-
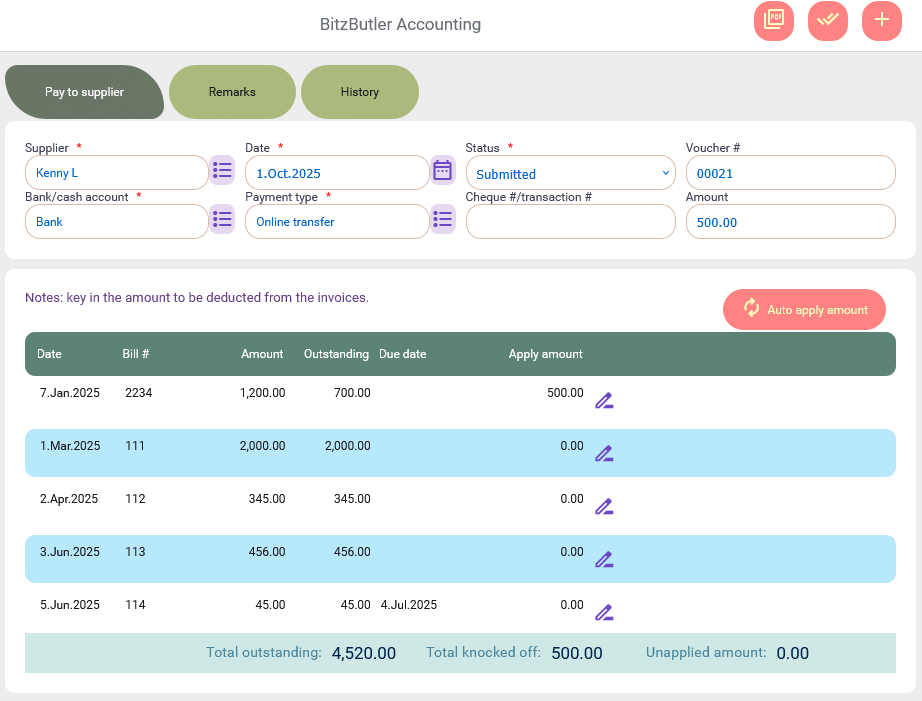
Choose a supplier and then the due invoices will appear on the screen.
-
Key in the date, amount, etc to complete the payment information. After you have keyed in the amount, click on any other field and the system will automatically apply the collected amount to the due invoices.
-
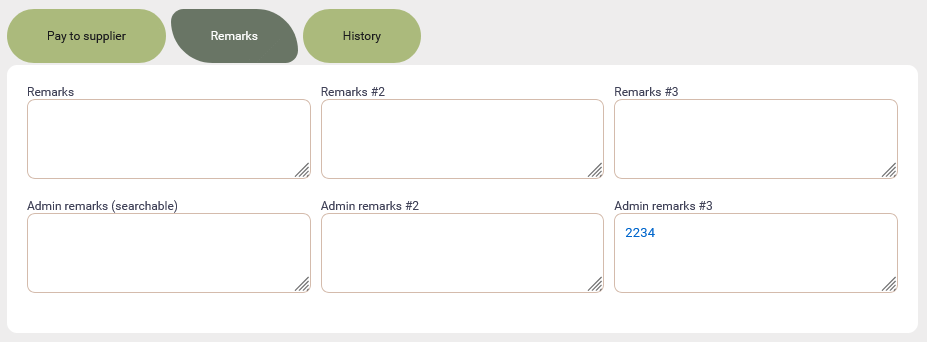
Switch to the Remarks tab. There are 6 remarks fields on this screen and you may have to decide the purpose of the remarks field. No hard rule.
In the 'Admin remarks #3' field, it shows the invoice number that was settled by this payment and it is automatically done by the system.
-
Click Save option (located at the top right) once you have done with the data entry. Then, the History tab will appear after successfully saving the data.
In the History tab, it has all the information about when the Pay to Supplier was issued and the changes made on this transaction.

Edit a Pay to Supplier transaction on desktop view
-
Double click on any row to edit the transaction OR click on the right arrow on any row.
-
Edit the necessary fields.
-
Click Save (located at the top right).
Delete a Pay to Supplier transaction on desktop view
-
Double click on any row to edit the transaction OR click on the right arrow on any row.
-
Choose 'Voided' from the Status field.
-
Click Save (located at the top right).
Notes: no transaction can be deleted from the database except marking the transaction as 'voided'. Once the status changes to 'Voided', the amount owing to the supplier will increase/restore.
Summary
Once you start keeping track of the payment to the supplier, you will be able to handle the cash flow for your business.
Start keeping track the payemnt to supplier for Free. No credit card needed to sign up.
